Mini-Review of Microsoft Livewriter
Microsoft LiveWriter or Liveâ„¢ Writer or Livewriter (whatever they are calling it) is, to quote Microsoft:
Windows Liveâ„¢ Writer is a free, downloadable program that will help you include rich content in your blog posts and know exactly what your blog will look like before you publish it to the Web.
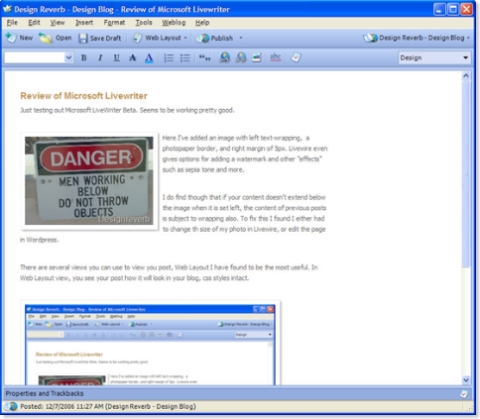
 Here I’ve added an image with left text-wrapping, a photopaper border, and right margin of 5px. LivewWiter even gives options for adding a watermark and other “effects” such as sepia tone and more.
I do find though that if your content doesn’t extend below the image when it is set to left or right text-wrapping, the content of previous posts is subject to wrapping also. To fix this I found I either had to change th size of my photo in LiveWriter, or edit the page in WordPress.
What’s pretty cool, at least in my humble opinion, is that when you insert an image, LiveWriter automatically links to the larger image. Also, since I have the lightbox plugin installed, it sets that up also. Go ahead, click on the image and see. Excellent, huh!
LiveWriter is basically a WYSIWYG editor. While there are several views you can use to view you post as you edit, I have found Web Layout to be the most useful. In Web Layout view, you see your post how it will look in your blog, css styles intact. Pretty cool.
All in all I’ve found Live Writer to be a useful tool, especially if you are not on the web all the time. Give it a try and lemme know what you think.


To prevent posts below from wrapping around your image, you can insert the tag into your post. This causes the browser to end the text-wrap.
Unfortunately, you have to flip to the source editing view in order to add this clear=all rule.
Ideally, your blog theme would automatically add a clear=all at the bottom of post to ensure text flowing in one post doesn’t affect the next post, but the world isn’t ideal 🙂
what beer do you like? 😉
Current beers of choice are Newcastle or Beck’s. 🙂